Showing posts with label PORTRAITS. Show all posts

Monday, July 16, 2012

WATERCOLOR PAINTINGS: More Ways to Use the Square

Here are examples of 6 more ways to use the square in your drawing and painting:


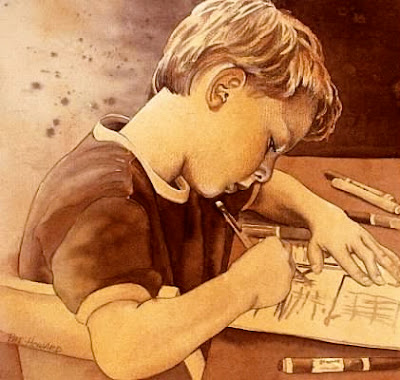
1)  SMALL, SQUARE, SEPIA-TONED PORTRAITS --


The above two portraits were painted on watercolor paper, and were each 12" x 12".


These next two portraits of Native Americans were painted on 8" x 8" Aquabord --


The following two portraits were painted on paper, with watercolor, and enhanced with watercolor pencils and charcoal . . . 


2)  MOSAIC PATTERN -- In these "Legs" paintings, the lower half of each painting is a field of colored squares, which looks like a tile mosaic pattern . . .


I've also super-imposed the grid pattern over the kids . . . 


The above two paintings are hanging in a Colorado hospital, in the pediatric ward; and the next three paintings are in a Fort Worth hospital . . . 


3)  LARGE BLOSSOMS on SMALL CRADLED AQUABORD SQUARES --


These square Aquabord panels are "cradled" (mounted on a wooden box).  They are about 2" deep, and the sides can be either painted or stained, so the paintings don't have to be matted and framed.


These little square paintings look great individually, or hung as a group, as above.


I sometimes continue the square theme in the background . . . 


4)  "PRISM" PAINTINGS -- The Grid is super-imposed on the subject.  It's painted realistically, but each square is a little different than the one next to it.  I like the contrast of the geometric shapes with the organic shapes. . . 


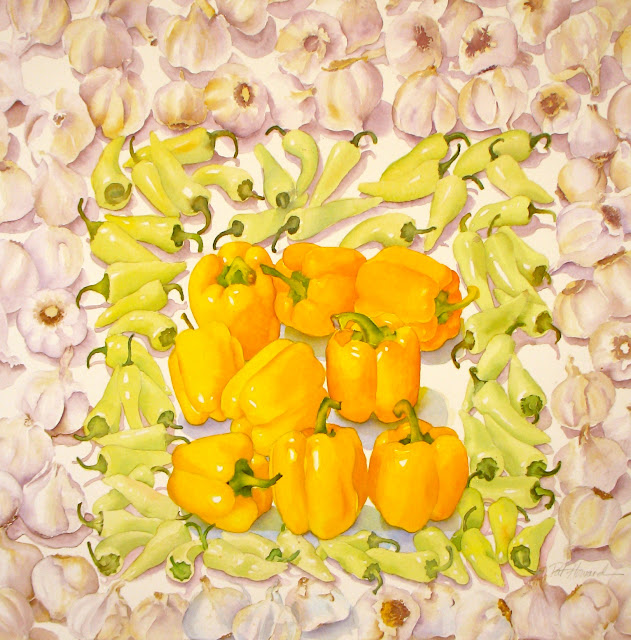
5) A SQUARE IN A SQUARE IN A SQUARE -- Inspired by Joseph Albers' Homage to the Square series of paintings.  Instead of square fields of color, I've implied the squares and filled them with veggies and fruit --


6) A SQUARE WITHIN A PATTERNED SQUARE FRAME -- 


 . . . and the pattern is also made up of squares.


Monday, July 9, 2012

HOW-TO PROJECT: Using the GRID as a Drawing Tool

The grid can be a useful tool for transferring and enlarging one of your drawings or sketches . . .


For this tutorial, I'm starting with one of my small contour drawings of a face.  The original drawing is 5" x 5", and I want to enlarge it to 10" x 10". . . 


I draw a grid directly onto the paper, in pencil -- horizontal and vertical lines, 1" apart -- resulting in 5 squares across and 5 squares down. . . 


If you don't want to draw directly onto your drawing, you can put tracing paper over your drawing and draw the grid on that.

Now, I divide some of the squares even further, with some diagonal lines (where the features are). . . 


I add a few more horizontal and vertical lines, in the eye and mouth areas . . . 


Now, it's time to draw the grid on the 10" x 10" square.  I start by drawing the horizontal and vertical lines.  Since I want 5 squares across and 5 squares down, I draw the lines 2" apart. . . 


I further divide some of the squares with diagonal lines (making sure that I'm dividing the exact same squares as the small drawing, in exactly the same way.)


Now, I finish the grid with a few more horizontal and vertical lines, so this grid exactly matches the small grid . . . 


It's now time to start drawing the face.  I start in the middle, drawing the contour lines in pencil . . . 


Then, I just move from square to square, drawing the lines within each section.  If it's helpful, you can cover up the sections that you're not drawing, so you don't get distracted.


When I've finished my drawing, I draw over the pencil lines with a black felt pen (don't draw the grid lines in ink!)


I finish by erasing the pencil grid lines . . . 


You can also use the grid when drawing from a photograph.  Just draw your grid on a piece of tracing paper, or make a copy of the photo and draw your grid on that.  Sometimes it's helpful to draw the grid lines in red, so you don't get confused.

Thursday, May 10, 2012

Tuesday, May 8, 2012

BEHIND THE SCENES: Finishing the Portrait


The finished portrait -- "J J on the Ice" . . .

______________________________________________________________________________


Here is how I completed the painting that was started last week -- 

We left off when I was beginning to paint the medium values of the blues . . . 


I then restated the reds and worked on his face and the far background, also adding some very light reds to some of the shadows on his jersey . . . 


Next, some lines and glazes were added to the surface of the ice, and then I started on the fun part -- adding the darks . . . 


I made sure to keep the darkest darks and the lightest lights in the main figure, for the most contrast -- that's where I want the emphasis to be . . . 


Then, I felt like I needed to add a blue shadow to the bottom of the painting and a blue glaze to the top of the painting and a few other places on the ice surface . . . 


Almost finished -- just a few more enhancements to his face, warming it up some more.  And, my signature . . . 


Yesterday, I matted it, sent a photo of it to Scott for his approval (and got it!), and then shipped the painting -- it should arrive in plenty of time for Mother's Day.  Hopefully, JJ's mother will love it!

Monday, April 30, 2012

BEHIND THE SCENES: Portrait Painting in Progress

I'm currently working on a portrait commission for a friend whose son has been playing hockey in Canada.  He wanted an action pose, so he sent me some photos of JJ, taken during a game.

I start with a pencil drawing, which I send back to my friend for approval.


After getting Scott's approval, I enlarge the drawing to the size that we've agreed upon . . . 


Then, I prepare the watercolor paper.  I stretch it onto gatorboard, and paint a wet-in-wet underpainting . . 


After the paper is bone dry and flat again, I transfer the drawing onto the paper, using transfer paper. . . 


Now, it's time to paint.  (First, I rub an eraser lightly over all the graphite lines, to lighten them a bit.)  I start with yellows and golds . . .


Then, I paint the reds -- very lightly . . . 


Now, for the light blues.  I also use the light cobalt blue to lay in some shadows, to start getting some form in his jersey and legs . . .


So, this is the first pass, where I get all the colors in, very lightly.  I'm not using any masking, so I need to preserve the white of the paper.


I then start painting the medium values . . . 


Stay tuned for the finished painting, and all the steps leading up to it.  I will be finishing this week, since it needs to be matted and shipped to arrive before Mother's Day!