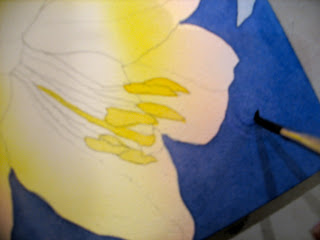
In this watercolor painting project, we'll be starting with a wet-in-wet MINGLING, doing some NEGATIVE painting, and LIFTING a pattern in the background.
You will see how much COLOR you can have in your white flowers and how to make sure your patterned background STAYS in the background.
You can purchase a pdf tutorial of this project, for $6, HERE.
For this painting, I used 7 pigments -- Aureolin Yellow, Quinacridone Rose, Cobalt Blue, Quinacridone Magenta, French Ultramarine, Permanent Sap Green, and Quinacridone Burnt Orange.
Begin the painting with a wet-in-wet mingling on stretched watercolor paper, using yellow, rose, and cobalt blue. Wet the paper with clear water -- then, leaving a little white off to one side, paint a ring of yellow, then the rose, then blue. Drop in a little yellow, rose, and blue on the left side of the paper, too. . .
After this underpainting is completely dry, draw a large lily, right of center. Take 2 or 3 of the petals off the paper. Then, draw two stems, a bud, and a few leaves. . .
Paint the bud, stem, leaves, and tops of the stamens with a yellow wash; and, let it dry . . .
Mix up a very light blue wash (using Cobalt Blue), and paint only the negative space with this blue. Don't wet the paper first -- paint the blue wash onto dry paper . . .
When that is totally dry, draw two more lilies with their stems and a few more leaves. Once again, take these flowers off the edges, so you break up the negative space into interesting shapes . . .
Now, mix a blue-violet wash, using the French Ultramarine, and the Magenta. Make sure there is plenty of water, and that it is more blue than purple. Paint only the negative shapes with this wash, onto dry paper . . .
After the background is dry, we will "lift" out a pattern in the background. We are lifting out instead of "masking" the lines, because we want the pattern to be subtle so that it stays in the background. If we were to use masking, the patterned lines would be too definite, so they would come forward in space, competing with the flowers.
Using a damp brush with a good point, draw a spiral with your brush . . .
Then, blot it with a paper towel . . .
Repeat this process until you can see the spiral. . .
Move around the background, lifting spirals -- until the entire background is covered with this spiral pattern . . . No need to draw this first with a pencil, and don't worry if your spirals aren't perfect -- it's actually better if they're not.
Now, start painting the stems and the tops of the stamens with a mix of Burnt Orange and Magenta. Paint a green wash on the bud, the leaves, and the stamens and pistil -- using a mixture of Cobalt Blue and Aureolin Yellow . . .
Continue painting the stems and the tops of the stamens, using a darker mixture of Burnt Orange/Magenta, with a little French Ultramarine added. Paint a darker value on parts of the leaves and the bud, using Sap Green -- and adding a little magenta to the bud and a little blue to the leaves. . .
Create some dimension and form to the petals, by painting a light Cobalt Blue to some areas, and by dropping in some magenta to the underside of the petals. Darken some areas of the flowers, as necessary . . .
If you'd rather have a pdf version of this tutorial, you can CLICK HERE.
For $6, you will get an instant download of this step-by-step tutorial, plus an introduction containing "Ten Things to Know About the Color BLUE".
For more on
. . . PREPARING YOUR PAPER,
see http://thepaintedprism.blogspot.com/2012/02/wednesday-workshop-stretching-paper.html
. . . NEGATIVE PAINTING,
see http://thepaintedprism.blogspot.com/2012/05/watercolor-workshop-negative-painting.html
. . . WATERCOLOR TECHNIQUES,
see http://thepaintedprism.blogspot.com/2012/04/top-ten-tuesday-10-techniques-every.html


